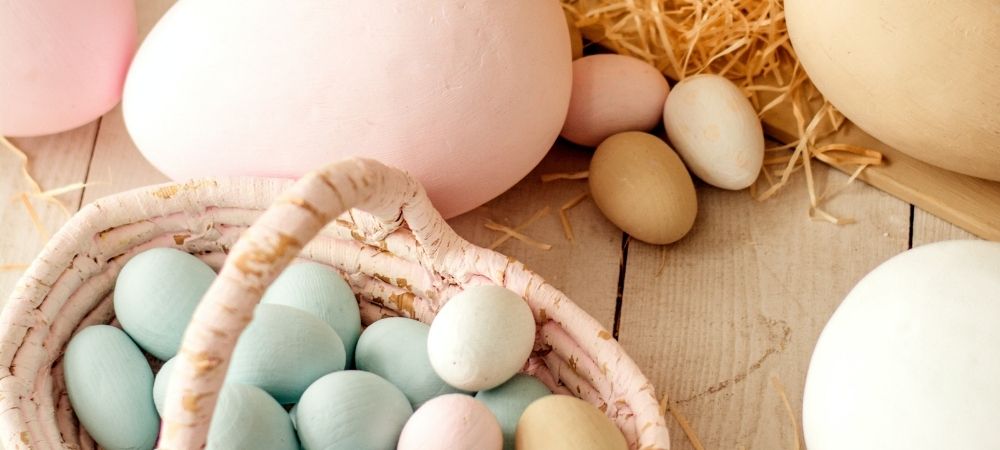
Easter is almost here, and that means it’s time to start thinking up fun ways to celebrate the season with the kids. One of the most traditional ways to do this is with an Easter egg hunt, which can be held in your garden or even inside your house if the weather turns wet and windy. For this, you’ll need one Easter basket per child, as this way they can search for hidden eggs and carry their discoveries around without the risk of dropping them.
Making Easter baskets is a great opportunity to spend some time with the kids during the Easter break, as it’s a fun, creative and educational activity that’s perfect for children of all ages. If you’ve never made one before, we’ve put together some top Easter basket ideas that range from homemade Easter baskets to simple methods of decorating store-bought versions. We’ve also rustled up some Easter facts in case the kids ask you any questions about this interesting occasion and you want to look like a bit of an egghead.
Before we jump into how to make an Easter basket, why not browse our range of Easter cards where you’ll find everything from bunny illustrations to chocolate-themed cards and religious designs:
And, we’ve got a helpful guide on what to write in an Easter card if you need help finding the perfect Easter greeting!
Why do we use Easter baskets?
When you think about it, hiding eggs around the garden, encouraging the children to collect them in baskets and then rewarding them with chocolate is a bit… well… weird. However, there’s a lot of history that comes with Easter baskets, eggs and bunnies, as they date back to ancient British cultures.
During the Anglo-Saxon period (between the 5th and 11th centuries), Easter marked the spring equinox and was a time when everyone prayed to the goddess of spring, fertility and bountiful harvests. The name of this pagan goddess was Eostre… see where we’re going with this? People would hold feasts in Eostre’s name and pay respect to her image, which showed her holding a woven basket. That’s where the season’s name and the use of baskets come in.
Fast forward to Medieval times and hares (considered a sign of abundance) were believed to leave baskets full of coloured eggs for the kids… and just like that, we have the origin of the Easter Bunny. Meanwhile, Christians saw the humble egg as a metaphor for the empty tomb of Jesus which, when cracked open, represents his resurrection. As for Catholics, they traditionally exchanged baskets full to the brim with mouth-watering treats to celebrate the end of Lent.
Over the centuries, these various ideas and traditions mixed together to create our current method of celebrating Easter – a happy and energetic bunny, plenty of eggs both of the painted variety and those made of chocolate, and charming baskets to carry them all in.
How to make Easter baskets
Now you’re clued up on the history, you’re probably wondering how to make your own Easter basket! Well, you can make your own Easter basket out of all kinds of materials, including wool, rope and cotton. Some of these can be quite difficult though, especially if you don’t know how to knit or sew, so we thought the best one to share would be this delightful design that looks like a wicker basket but is actually made out of brown paper. Making Easter baskets doesn’t have to be tricky, and below we’ve outlined some simple things you’ll need to gather:
What you’ll need
- Thick brown paper
- Scissors
- Craft glue
- A ruler or tape measure
- A few clothes pegs
Instructions for making your Easter basket
Wondering how to make Easter baskets out of paper? Follow these super simple instructions:
- If your brown paper is in a roll, make sure to flatten it out first by covering it in something heavy, such as a few books.
- Cut out sixteen strips of brown paper, each measuring 30mm by 760mm.
- Fold each strip twice so that they’re only 10mm wide.
- Cut eight of the strips in half so that you have eight long ones and sixteen shorter ones.
- Take eight of the short strips and lay them vertically side by side. Starting at the centre, weave the other eight short strips across them horizontally, so that each horizontal strip goes under one strip and then over the next. As you weave, glue the strips together at each point where they overlap. You should now have a central base with eight strips extending beyond each edge.
- To create the walls of the basket, lift up the protruding strips and weave four of the longer strips around them, gently tightening everything up as you go.
- There should be some ends still protruding – cut them to about 10mm and fold inside the basket, then glue into place. Clothes pegs can be used to keep the basket together whilst the glue dries.
- Take three of the long strips, glue their tops together and hold them in place with a clothes peg. Now plait them together and then glue the ends together (again, attach clothes pegs if required). You’ve now created the basket’s handle.
- Once the handle is ready, attach it with glue to the middle point of two opposite walls of the basket.
- You should have one strip left. This isn’t a mistake, as it can now be stuck along the inside top edge of the basket to reinforce it and make it egg-worthy. Make sure that it covers the handle joints so that it strengthens them. Your basket is now ready to decorate!
How to decorate your Easter baskets
Making is only half the fun, and now you know how to make an Easter basket, it’s time to learn how to decorate one in all kinds of bright and colourful ways. These tips are also ideal if you’ve saved time by purchasing Easter baskets from a supermarket, online retailer or crafts store.
Pom poms
Adding pom poms to an Easter basket immediately makes it look absolutely fabulous. Choose white and yellow for a classic spring vibe or express yourself through all kinds of crazy shades and combinations.
Mini chicks
You can buy mini fluffy chicks from pretty much anywhere during the Easter season. They usually come in packs of anywhere from a dozen to a billion and make the perfect addition to Easter baskets and other seasonal decorations.
Tissue paper
Before you ask, we don’t mean toilet roll. Instead, go for craft tissue paper and either scrunch it into balls or shred it to create a soft and colourful base for your Easter baskets.
Ribbon
Silk ribbon adds a true touch of elegance to an Easter basket. We suggest wrapping it around the handle and tying it in a bow for that traditional Easter aesthetic.
Felt shapes
This is a brilliant Easter craft in itself and super easy, as the kids can make all kinds of animals and objects using pieces of felt. Simply cut out different shapes and glue them together to create everything from lambs and bunnies to eggs and flowers.
Embrace glitter
Apply glue in patterns of your choosing, then liberally sprinkle glitter all over your DIY Easter basket. This option will allow you to add a touch of sparkly magic to your Easter celebrations.
Pastel paints
Nothing screams Easter more than gentle shades of lavender, mint, and lemon. So, why not get super creative this year and decorate your basket with some pretty pastel paints?
You now know how to make Easter baskets with the kids – yet another awesome life skill brought to you by the thortful team. If you’ve enjoyed this activity, make sure to also have a go at these spring crafts for kids and adults. And don’t forget to send your friends, family and neighbours some lovely Easter cards or maybe even a luxurious chocolate Easter card.
Looking for more fun ideas for special occasions? Check out our how-to guides and the thortful blog for tons of inspiration.


