Everyone loves to receive flowers, and can appreciate some beautiful blooms in the garden – truly one of life’s little joys. The only real problem with flowers, to be honest, is that they don’t last forever. The solution: flower pressing. We’re here to explain the traditional art of how to press flowers, so you can create pretty flowers for crafting or hold onto that particular bouquet with real sentimental value.
Maybe you want to save flowers from your wedding bouquet, or from a special anniversary. Maybe you’d like to press flowers from a special day, like an afternoon spent picking flowers in the garden with your grandkids, or daisies from a picnic with friends. You can create beautiful art with pressed flowers, from scrapbooks to glass frames, which look so stylish in Scandinavian hygge-style home décor.
No matter why you want to press flowers, our guide to creating pretty pressed flowers is fool-proof – so give it a try. It’s an easy way to spend a day crafting with kids in springtime, and even winter flowers can be used to make pretty Christmas crafts.
How do you press flowers?
You might think it’s as easy as chucking a flower in between two heavy objects and leaving it on top of a radiator… and, well, okay, it’s a bit like that, but there’s more of an art to flower pressing. Here are our recommended steps for how to press flowers, suitable for even beginners!
1. Pick your flowers
If you’re picking your own flowers from your garden, cut them after the morning dew has evaporated, and avoid rainy days. You want your flowers to be as dry as possible when you start pressing them.
2. Prep store-bought flowers or bouquets
You can give your pressed flowers a little boost before you flatten them down by encouraging them to bloom. A few hours before you want to start flower pressing, snip the stems at an angle and place them in a vase with flower food or a spoonful of sugar to help them blossom to their best. Remove any leaves that sit below the water in the vase. When you’re ready to press the flowers, thoroughly blot the flowers and stems with kitchen towels to wick away any excess moisture.
3. Pick a book to press flowers with
Pick a few heavy books – we’re talking a big old almanac, or a couple of hefty Game of Thrones tomes, that kind of thing. Choose a book that’s big enough to completely cover your flowers, as any ends that stick out won’t dry fully.
4. Line your book
Open your book, and line a double-page spread with newspaper. You can also use plain tissues or parchment paper, and even coffee filters work well! Avoid kitchen towels with a pattern – the embossed texture can actually imprint onto the delicate petals. The paper will absorb the moisture from the flowers as they dry.
5. Arrange your pressed flowers
Place your flowers on the page, as flat as you can. Put the flowers closer to the book’s spine, as this helps to make sure that most of the book’s weight is pressing down on the flowers. Close the book, making sure you don’t dislodge the flowers.
6. Weigh down the book to press the flowers
You’ll need pressure to press the flowers (groundbreaking, we know.) Create this by stacking more heavy books on top of your flower-pressing book. Try to make sure you’ve got an even pressure on the flower – if there’s a leaf or petal that’s not being pressed into the newspaper, it could just shrivel up and ruin the delicate look you’re aiming for, and we’re not about pressed flowers.
7. Dry your flowers out
When flower pressing, you need to dry the flowers as quickly as possible – otherwise you risk the flowers going brown or fading, and you’ll lose the pretty colouring, which is kind of the whole point in the first place. Once you’ve got your pressed flowers carefully arranged in a book, you need to find somewhere warm and dry to store them for a few days. Ideal spots would be in your airing cupboard near your central heating boiler, by a radiator, or in a warm and sunny spot in summer.
How long does it take to press flowers?
Pressing flowers can take around 7 to 10 days to press flowers flat. Pressing flowers isn’t the speediest process, as it does take days for your pressed flowers to truly dry out, but it’s well worth your patience! When you take your flowers out, you might want to use tweezers to transfer them to your scrapbook/art piece/frame – they’ll be really fragile.
Flower pressing top tips
- Choose fresh flowers – ideally ones that have just bloomed, or ones that are still in bud – to get the best results. If your flowers are already starting to wilt or dry up they can still be pressed, but they might not look quite as ‘lifelike’.
- Remember, however your flowers look as you press them is how they’ll (hopefully) look once dried, so take your time making sure they’re arranged, and that the petals are lying where you want them.
- The faster your flowers dry, the more likely you’ll keep the colours intact – but if you leave your pressed flowers somewhere too hot you’re more likely to cook them, so pick carefully. If it’s the middle of winter and your radiators are on full-blast, move your pressed flowers a little further away to start with.
- Gently warming your newspaper before pressing flowers can help to get rid of moisture and ensure a better finish on your pressed flowers!
How to press flowers with a flower press
If you want to get professional, you can also get flower presses and flower pressing kits online, like the beautiful hand-painted wooden flower press from Anna Wiscombe, or more affordable options like a simple wooden flower press from CJ Wildlife.
If you’re wondering how to press flowers with what essentially looks like two bits of wood, the process is pretty much the same as flower pressing with a book. Lie down your flowers carefully, then tighten the screws on the flower press to push the plates together. The benefit of using flower pressing with a press like this is that you can keep a consistent, very tight pressure on the flowers (and also you don’t have to keep a giant stack of heavy books about).
The best flowers to press
Not to sound obvious, but the best flowers to press are the ones you have access to! You can pick flowers from your garden, or press flowers from a bouquet. If you want to pick wildflowers, make sure not to take too many flowers from a single spot or to damage the area you’re picking from.
The Botanical Society of Britain and Ireland have a Code of Conduct, which you should follow when you’re picking wild flowers for pressing, including a list of protected plants you shouldn’t pick. A good rule to stick to is the ‘one in twenty’ rule – basically, if there are twenty plants, it’s okay to take from one of them.
Now we’ve done the ‘don’t’ here’s the ‘do’:
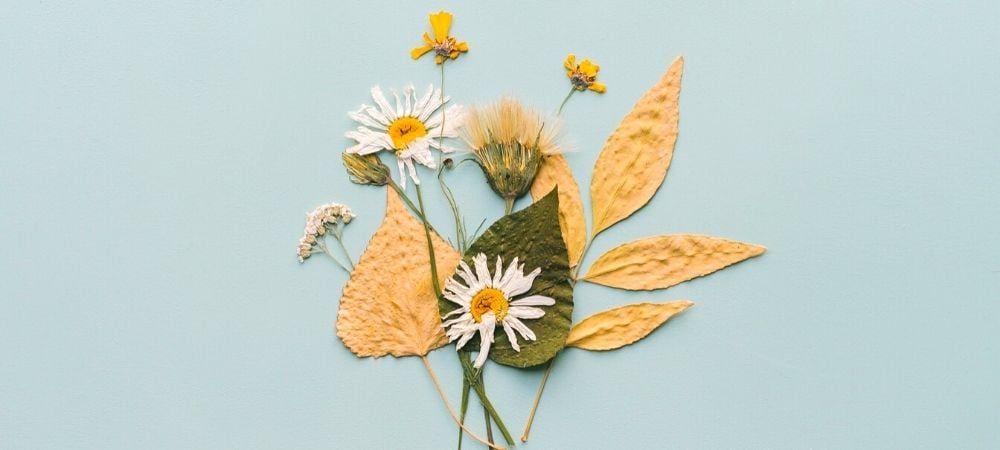
Look for flowers that naturally lie flat
The best flowers to press are ones that naturally lie flat, like pansies, violets and daisies. Flowers with a single row of petals are some of the best flowers to press.
Cut bigger flowers in half
Bulkier flowers like roses or peonies might not press as well as they’re very thick, but you can try carefully cutting them in half, cutting straight down the stem to create two symmetrical halves. If you’re lucky enough, when you cut the flower in half you might end up with two sides of the flower, so you can try pressing both!
Roses can be tricky
Roses can be especially tricky, and aren’t the best flowers to press, but there’s still options. You might need to remove some petals to get the flower to lie flat, but take your time arranging them and you can still get a lovely end result.
Just press the petals
If in doubt – or if you’re pressing flowers that you want to keep for sentimental reasons, like flowers from a wedding or special anniversary – you can always press individual petals, and reassemble them into a flower shape in a scrapbook or frame.
Give flower pressing a try to celebrate spring blooms, or why not try pressing a few blooms from a thortful bouquet? And if all this talk of flowers has got you feeling inspired, check out a few of our beautiful floral flower cards.
For more crafting ideas, check out our how to guides on fun crafts like making your own Christmas tree decorations, or how to get started with calligraphy.