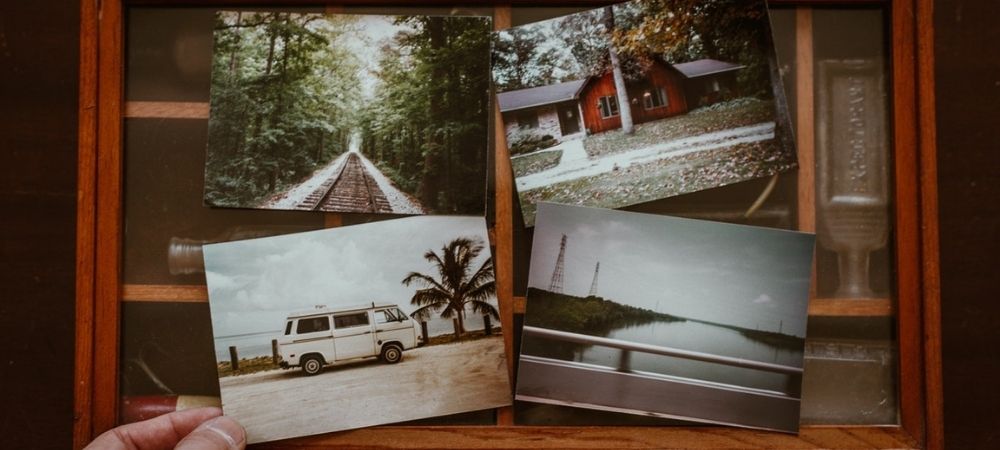
There’s no better way to capture those memorable moments than with the perfect picture. But as nice as it is to have all those great occasions stored on our phones at just a button’s press away, sometimes, it’s even better to have the physical thing.
The way we take and develop photos might have changed since the advent of smartphones, but that doesn’t mean any of us have stopped wanting to decorate our homes with cherished memories of times past. Plus, if you’ve got a special birthday photo card, you could always keep it in a photo frame to keep it safe.
Problem is, the nicest photo frames are often a tad pricey – or don’t fit your chosen photos. So, how do you get a photo frame that not only looks great but also doesn’t break the bank? You make your own, of course! Not only is it easy to make photo frames at home, but they also help to make those favourite pictures even more special by giving them a personalised, handcrafted frame to sit in. They make brilliant, thoughtful gifts for loved ones to go with Christmas cards and birthday cards, and you can even get the kids involved when making them.
So free up your weekend or evening and get your crafting gear together – we’re taking you through four ways you can make photo frames at home at minimal cost.
What do you need to make your own photo frame?
Before we get started on crafting a home for your fave couple selfie snap or family holiday photo, it’s important to make sure you have everything you need.
Besides the craft materials we’ll be using throughout this article to make your own photo frame, all of which you’ll be able to get from your nearest hobby store, you’ll also need a few tools.
You’ll need:
- A pair of scissors
- Crafting glue
- Craft knife and a cutting board
- Sandpaper
Most importantly, always remember to put safety first, especially if you’re working with kids. If the use of a craft knife is required, you should handle this yourself and let them take over the decorating.
How to make a photo frame with cardboard
The classic way to make your own photo frame, crafting cardboard or construction paper makes for a simple yet flexible material to make any kind of frame you desire.
Cardboard frames take little time at all to make, but can be decorated in any number of ways. Buttons, ribbons, cloth, paper, or thread-wrapping – you name it, and it can probably be used to decorate them.
- Use your photo to trace the right size onto your cardboard
- Cut out your cardboard, making sure that it’s a few centimetres larger than your chosen picture. Hearts and circles can make for a more visually eye-catching shape, but for our example, we’ll be sticking to the classic rectangle.
- Once you’ve cut your shape out, cut out the same shape again on its inside, this time making sure that it’s slightly smaller than your picture.
- Next comes the best part, decorating the frame! However you want your frame to look, take the time to style it to perfection, using your craft glue to attach things like buttons or ribbons, or keeping any wound thread connected to the frame.
- With your frame decorated, the next step is to take some more cardboard and cut out the same shape as your frame, making it slightly smaller than the whole of the frame. Again, decorate it so it matches your chosen style, then glue it to the frame’s back, making sure to leave the top side open so you can slide your photo in.
- Last, but not least, depending on where you want to place your photo, you can either glue some thread to the back-top of the frame to hang it, or add a flap of cardboard to the back to act as a stand.
Then, all that’s left to do is slide in your photo, position it perfectly, and you’re done!
Making a frame with lollypop sticks
As good as a decorated cardboard frame can look, if you’re after something a little more stylish or chic, then look no further than using your old lollypop sticks.
For this design, you’ll need two long lollypop sticks that are just longer than the width of your photo.
- Start by positioning these two sticks apart at the length of a standard lollypop stick.
- Then, take as many lollypop sticks as required to cover the longer lollypop sticks, leaving a small gap at either end.
- Before you assemble your photo frame, now’s the time to decorate your sticks how you see fit; though if you plan on using things like buttons, we recommend covering the entirety of the top of the sticks with them to ensure a smooth seal for your picture.
- Next, carefully glue your standard lollypop sticks on top of the longer lollypop sticks one beside the other, making sure that no glue seeps up through the gaps.
- Once done, place a mug or two on either side of the lollypops to act as a weight and help the glue stick more thoroughly.
- Once the frame has set, decorate it further if you’d like and then attach your photo with glue, pins, or lodged under a few decorative items.
To hang your photo, you can glue thread behind it to act as a hook, or if you want it on your fridge, you could glue some magnetic strips to the longer lollypop sticks.
Making a photo frame with wood
Of course, making a photo frame doesn’t just have to involve normal crafting materials. If you want something a bit more old-school and rustic, you could make your own photo frame from wood.
But don’t worry if you’re not familiar with wood crafting; we’re not going to ask you to build a table. All you need is a wooden slat to fit your picture and a smaller piece to glue to it to act as a base.
- Start by finding a wooden slat that fits the size of your photo – you might have to print your photo to fit or sand the wood slat’s sides down if it’s a little large.
- Next, sand the corners of your wood slat so they’re smooth and rounded, doing the same to the corners of your smaller wood piece as well.
- Using a wood stain of your preferred colour, coat your wood so you get a nice even finish across it. Alternatively, if you want a more rustic feel, you could make the coat much thinner, so it still reveals the wood’s natural texture.
- Once dry, use wood-friendly adhesive to glue your smaller piece of wood to the base of your larger slat so it sits just above the bottom edge.
- For finishing touches, glue a clip near the top of the slat to hold your photo in place, and then add other decorative touches, like shells or bows, around the edges until you’re satisfied.
Making a photo frame with magnets
For our final option, how about a unique design to make a frame that you can easily replace the photos in? All you need is four thin strips of wood of equal length, a length of thread, and some magnetic strips.
- Start by sanding your pieces of wood to remove any sharp edges and rough spots.
- Then, clamp your magnetic strips into pairs if they aren’t already and glue both pairs to a separate piece of wood.
- Next, glue the other remaining pieces of wood to the other sides.
- Apply pressure with a few mugs and wait for the glue to dry.
- Once dry, you should be able to pull them apart and be left with four pieces of wood with magnetic strips.
- The last step is to take your thread and knot it around one of the wood slabs at either end of its magnetic strip.
After all this, simply clamp your photo between the strips and hang it where you want!
Making a photograph frame with other craft materials
These are just four ways that you could try to make photo frames at home, but there are plenty of other ways to get crafty with it.
You could try making frames out of old magazines and doweling rods, cover your cardboard frame in crochet or embroidery or even try your hand at making a full wood frame yourself. Just remember to be safe when using any sharp tools.
And it’s not just photos you can make yourself. If you know your friends and family love a good homemade gift, check out our How To guides and find out how to make creative presents, from how to make a candle. You can also visit the how-to part of the thortful blog to see what other creative gifts you can make to go with your photo frame.
Here at thortful, we have thousands of uniquely crafted cards made by hundreds of independent creators. Whether you’re after a funny Valentine’s card or a we’re sure to have something to suit your needs.