Spring has sprung, and the Easter bunny is on the loose! Soon chocolate will be pouring out of your Easter baskets, and eggs will be found hidden inside your drawers and beneath the stairs.
Do you need some help decorating your eggs this year? Or are your children bored of the same old spring chicken and rabbit designs? Then check out our list of funny egg decorating ideas! They’re perfect for everybody, big or small.
And why not make this Easter extra special and pick up one of our Easter cards? All of our cards are made with unique designs from independent creatives, so you can celebrate Easter and help small businesses at the same time! Take a look at our beautiful collection below:


And if the messages have you stumped, take a look at our easy guide on what to write in an Easter card.
Why Easter eggs?
For centuries, eggs have been symbolic for rebirth and renewal, representing the beginning of spring. Christians later gave the egg an extra layer of meaning, connecting it to the story of Jesus’ resurrection. There’s also a practical reason eggs became part of the celebration. During Lent – the period of fasting before Easter – eggs were not to be eaten, so they were hard-boiled and stored for later use. And when the time came to end fasting, the eggs were decorated and brought out in celebration!
Now kids all over the world squeal with excitement when Easter comes along and it’s time to decorate eggs. It can be a fun activity to get the whole family’s creative juices flowing, and we have 10 different ways you can decorate your eggs this year. We guarantee you’ll find some colourful inspiration that leaves your friends asking, “how are your eggs so amazing?!”
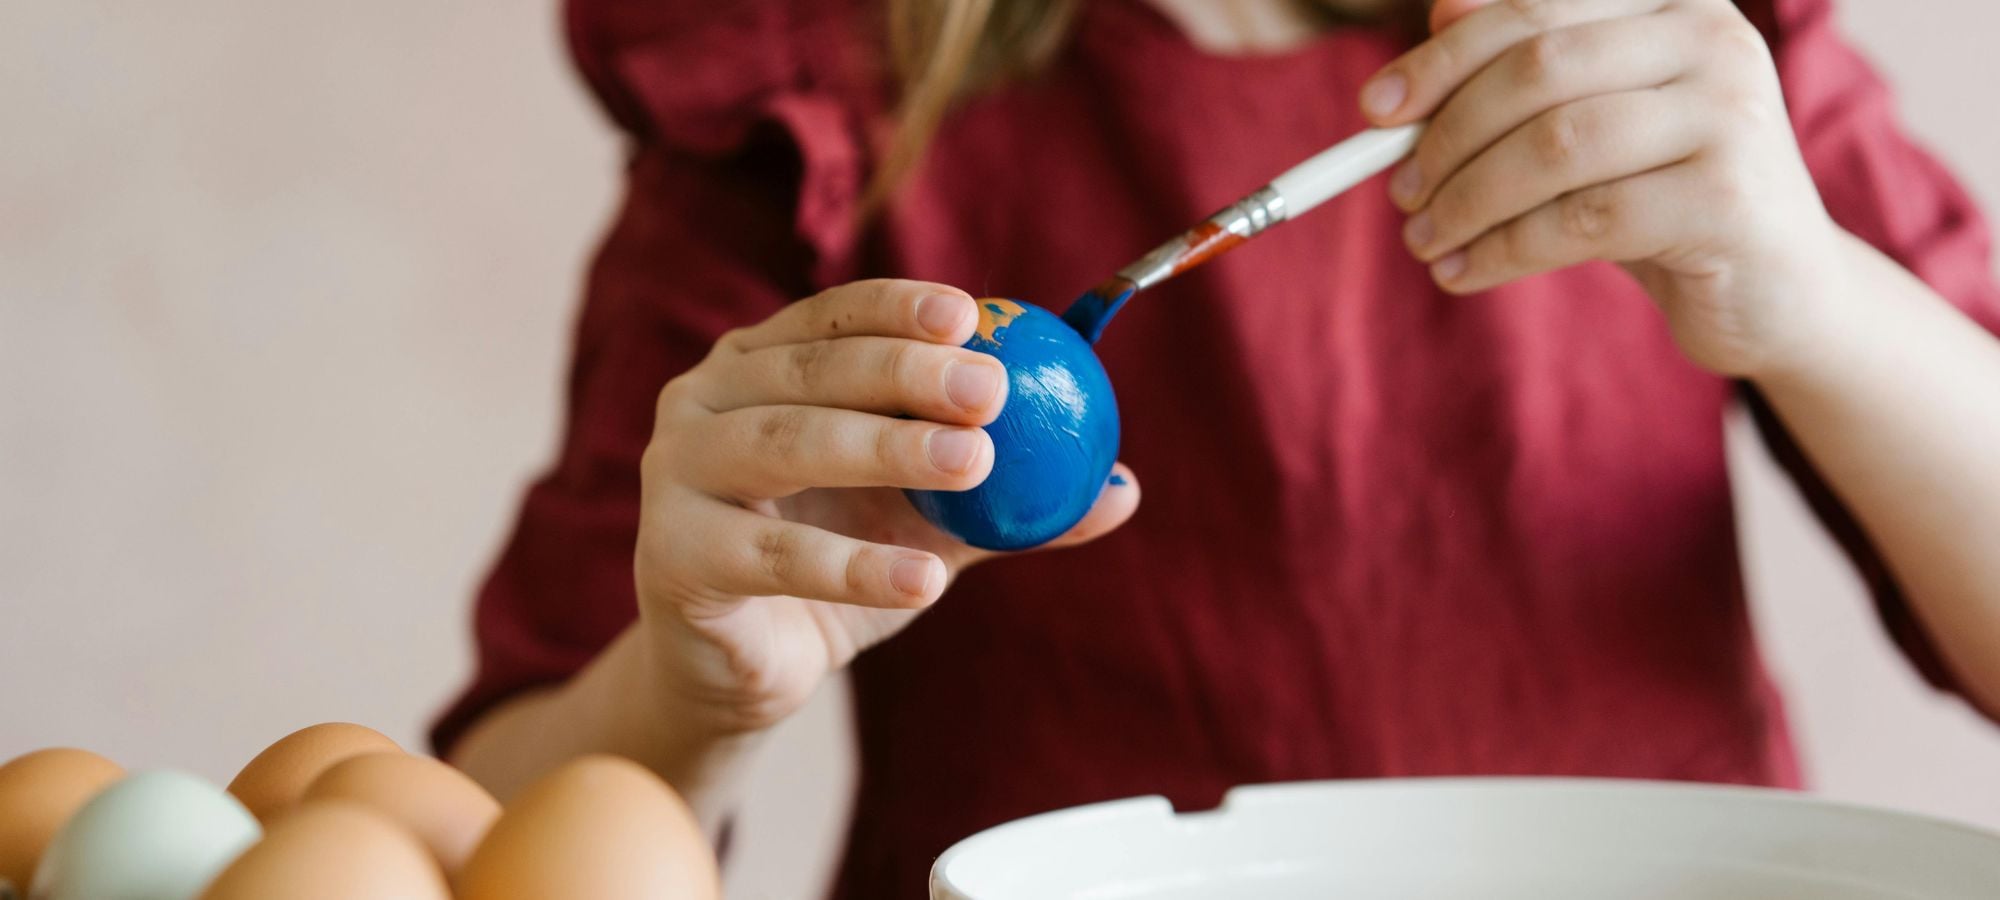
1. Food colouring eggs
This first design is simple but effective, and you don’t need a huge list of materials. All you will need is:
- Eggs (white is preferable)
- Food dye
- Jug of water
- Spoon
- Selection of cups
Drop a few drops of food dye into your cup and add a little bit of water – be careful not to add too much so it doesn’t overflow. Submerge your egg into the water and leave to rest for an hour. Then repeat this process with different colours. If you want to switch up your looks, experiment with different mixes of dyes and submerge for different lengths of time. Soon you will have an army of beautifully dyed Easter eggs.
2. Gold leaf eggs
With this simple trick, you can turn your eggs from boring food to eggs laid by wondrous beasts. For added effect, you can label these as dragon eggs, or eggs laid by phoenixes. What you will need is:
- Eggs
- Paintbrushes
- Paint
- Gold leaf
- Gilding paste
First you want to completely cover your egg in paint – try using a roll of tape to keep the egg in place. Once that is done, cover the parts of the egg you want to place the gold leaf on with gilding paste, and leave to rest for ten minutes. Then the egg should be good to go. Carefully place your gold leaf on the now tacky parts of the egg, and watch your eggs transform into gilded spectacles that will make any Easter bunny jealous.
If you’re looking for ideas on where to place your Easter eggs, check out our blog on how to make Easter baskets and take your newly decorated eggs to the next level.
3. Marbled eggs
These eggs are great if you want a group of classy looking eggs. And if you plan on staging an Easter egg hunt, these wonderfully crafted eggs would be hard to miss, perfect for children who are struggling with those tricky hiding spots. If you’re planning on throwing your own hunt, why not check out our blog on Easter egg hunt ideas? As no Easter is complete without a traditional egg hunt.
For these marbled eggs, you will need:
- Eggs (try ceramic eggs for a finer finish)
- Kitchen towel
- Plates
- Marbling bath
- Marbling inks
- Whisk
- Cocktail stick
For this technique, add two teaspoons of your marbling bath to 1 litre of water and whisk. Leave the mixture to sit for two hours. Then add a couple of drops of the marbling ink and let it sit on top of the mixture. Repeat with a separate colour and use a cocktail stick to swirl the colours. Dip your egg into the mixture and watch as the colours transfer onto the egg. Place the egg on a paper towel and let it dry. And presto! You now have a beautiful, marbled egg. Experiment with different colours and different parts of the egg to make each one unique.
4. Egg family
If you have ever wanted to see your family immortalised in egg form, well now is your chance. Here’s what you need to turn your eggs into mum and dad:
- Paint
- Paintbrushes
- Pencils
- Permanent marker
You first want to cover your eggs in a coat of pastel coloured paint – one-part white paint and two parts your chosen colour. Once they’re dry, apply a second coat to make sure it’s even. When the second coat is dry, use a pencil to outline the facial features and where you want the hair to sit. Try some glasses for grandma, or a funny moustache for dad. Use the unmixed paint to fill in the hair and leave to dry once again. Finally, go over the pencilled outlines with permanent marker to make the features stand out. You should then have a little egg family sat before you!
5. Wool-wrapped egg
This is one of our favourite Easter egg design ideas, and it doesn’t take a lot of materials. For this design, you will need:
- Wool (two different colours)
- All-in-one glue
- Paintbrushes
- Decorative flowers
Firstly, you want to cover your egg in the glue. (Try using a roll of tape to keep the egg stationary.) Then slowly from top to bottom, wrap the egg in the wool, and add another layer of glue over it to secure it. You will need to let it dry first before you do the bottom half. Then with more glue, stick the different coloured wool onto the egg in long strips to simulate branches. Finish off with the decorative flowers and there you have it! A hand-crafted egg as gorgeous as your very own flower garden.
If you want to discover more spring crafts for your kids, check out our blog and find some amazing ways to celebrate this Easter.
6. Fabric-wrapped Easter eggs
Tired of getting your hands covered in paint? Then why not try out some fabric-wrapped eggs that look great in any Easter basket or display? For this design, you will need:
- Eggs
- All-purpose glue
- Fabric
- Scissors
- Ruler
You will want to cut the fabric first; we recommend about 8-inch strips. Then apply your glue to the strips of fabric and wrap it around the egg. Continue this until the egg is fully covered and leave to dry. And if you want to add an extra bit of decoration, try wrapping a bow around the egg’s middle to give it an extra pinch of cuteness.
7. Pom-pom bunny eggs
This cute design lets you use the standard colour of your egg without unnecessary painting. Brown is the perfect colour for a rabbit’s tummy, and this is what your egg will become! Before making this funny egg decorating idea, you will need:
- Pipe cleaners
- All-purpose glue
- Pom-poms
You will want to begin by cutting a 6-inch piece of pipe cleaner and folding it in half twice to create a “M” shape. Then twist the two ends of the pipe cleaner together to make your little bunny ears. Then glue your bunny ears to the pom-pom and you will have a perfect bunny head. Once that is attached to the top of your egg, your bunny will come to life, and it will be ready to put on display. Try adding a small bow or tie to your bunnies to give them a little more character.
Once these bunnies are ready, you’ll be all set for the greatest Easter party ever. See our guide on Easter party ideas if you’re thinking of throwing your own.
8. Chick Easter eggs
You have your bunnies, now you need some chicks. This egg decorating idea is cheap and cheerful, and a great one for young children who want to get in on the fun! You will only need:
- Yellow dye/paint
- Permanent marker
- Eggs
Start by dipping one half of your egg into the yellow paint, leaving the other half bare. Once dried, paint on the little chick faces and place them in a basket full of paper. It will be like a handful of baby chicks napping happily in their nest. Change up the face designs to make each chick unique.
9. Candy floss egg nest
If you’re wanting a quick way to style your Easter eggs, then the candy floss egg nest is the design for you. All you will need is:
- Eggs
- A paint of your choice
- Candy floss
Simply paint your eggs in any style and colour you want and lay them in a small bundle of candy floss. These make great table displays and perfect for any Easter party or celebration. And if you’re looking for more ways to keep your kids entertained this Easter, have a look at our downloadable Easter colouring ideas.
10. Carrot Easter eggs
The Easter bunny will be hungry after his long night of hiding eggs. So why not leave him some snacks to reward him? This cute design is simple but effective. All you will need is:
- Eggs (preferably white)
- Orange paint
- Green tissue paper
- Hot glue
- Permanent marker
- Scissors
Start by painting your eggs orange and leaving them to dry. Then cut your tissue paper into two 3-inch strips and twist together at one end. Once the tissue is glued to the top of your now orange egg, use the marker to create lines and texture to mimic the skin of a carrot.
And there you have it! 10 egg decorating ideas that will fill your home with Easter joy. And remember to celebrate Easter properly with one of our wonderful Easter cards.